


Tutorial: Building a RESTful API with Flask
Table of Contents
- What is an API?
- What is REST?
- HTTP and requests
- Creating the API with Flask
- Verifying endpoints with Postman
- Conclusion
In this tutorial, we’ll be learning and creating RESTful APIs with Flask. To follow along with this tutorial, you should already have a good grasp of Python, Flask, and SQLAlchemy.
Since the application we’re going to build in this article is an extension of the one we built earlier in the Flask SQLAlchemy Tutorial, make sure you’ve already read that post and have the code available for our API additions!
What is an API?
API is one of those technical terms that gets thrown around a lot in the programming world. We hear about people creating applications using Uber APIs or Google Map APIs. For example, I created a job search application using Twitter’s API. But what exactly is an API, and why is it so important?
API stands for Application Programming Interface, and it refers to the mode of communication between any two software applications. An API is just a medium that lets two entities of code talk to each other.
Have you ever implemented Google Maps in your application or have seen an app that makes use of Google Maps? That’s the Google Maps API.
Watch this tutorial to see the Twitter API in action:
Companies like Google and Facebook, among many others, have APIs that allow external applications to use their functionalities without exposing their codebase to the world. There’s a high chance that an organization you want to work with already has an API in place – both for developers and end users.
But why do companies allow us to use their content via APIs? By allowing users access to their content, businesses add value for developers and users alike. Instead of building a new functionality from scratch and re-inventing the wheel, developers can use existing APIs and focus on their primary objectives. This practice actually helps organizations by building relationships with developers and growing their user base.
Now that we have a grasp on APIs, let’s talk about REST.
What is REST?
Like API, REST is an acronym, and it stands of Representational State Transfer. It’s an architectural style for designing standards between computers, making it easier for systems to communicate with each other. In simpler terms, REST is a set of rules developers follow when they create APIs. A system is called RESTful when it adheres to these constraints.
To better understand RESTful APIs, we need to define what the terms “client” and the “resource” mean.
Client: A client can refer to either a developer or software application which uses the API. When you are implementing the Google Maps API in your application, you are accessing resources via the API, which makes you a client. Similarly, a web browser can also be a client.
Resource: A resource describes an object, data, or piece of information that you may need to store or send to other services. For example, the location coordinates you receive when you work with Google Maps API are a resource.
So, when a client sends a request to the server, it receives access to a resource. But what language do clients and servers use?
For humans to speak to each other, we have proper syntax and grammar. Without them, it’s impossible to understand what’s being communicated. Similarly, APIs have a set of rules for machines to communicate with each other that are called Protocols.
HTTP and requests
HTTP is one of the protocols that allows you to fetch resources. It is the basis of any data transfer on the Web and a client-server protocol. RESTful APIs almost always rely on HTTP.
When we are working with RESTful APIs, a client will send an HTTP request, and the server will respond with the HTTP response. Let’s dig into what HTTP requests and HTTP responses entail.
When an HTTP request is sent to the server, it usually contains the following:
- A header
- A blank line that separates the header with the body
- An optional body
The header consists of an HTTP verb, URI and an HTTP version number which is collectively called a request line.
GET /home.html HTTP/1.1In the above example, GET is an HTTP verb, home.html is a URI where we want to get the data from, and HTTP/1.1 refers to the HTTP version.
GET isn’t the only HTTP verb out there, so let’s look at some of the other HTTP verbs commonly used.
GET: The GET method is only used to retrieve information from the given server. Requests using this method should only recover data and should have no other effect on the data.POST: A POST request is used to send data back to the server using HTML forms.PUT: A PUT request replaces all the current representations of the target resource with the uploaded content.DELETE: A DELETE request removes all the current representations of the target resource given by URI.
When a server receives the request, it sends a message back to the client. If the requests are successful, it returns the data requested else it will return the error.
When an HTTP response is sent back to the client, it usually contains the following:
- A header
- A blank line that separates the header from the body
- An optional body
This time, the header contains the HTTP version, status code, and reason phrase that explains the status code in the plain language.
Have you ever seen an error 404 Not Found? That’s one of the status codes where 404 is a status code followed by the reason phrase.
There are many codes sent between the server and the client. Some of the common ones are as follows:
- 200 OK: This means the request was successful
- 201 Created: This means the resource has been created
- 400 Bad Request: The request cannot be processed because of bad request syntax
- 404 Not Found: This says the server wasn’t able to find the requested page
Luckily, Flask’s implementation takes care of most of this for us on its own, but it’s still useful to know about response codes in order to get the most from API responses.
Creating the API with Flask
This post is a part of Kite’s new series on Python. You can check out the code from this and other posts on our GitHub repository.
As a standalone application, our books database is helpful, but we’ve now realized we want to allow an online book rating service to access our library. Also, we’d like for our online flashcards to be automatically tagged with books, instead of entering book details manually.
As our library grows, our developer followers may be interested in seeing our list, or adding new suggested books. An API with Flask is just the thing.
Let’s create some endpoints for the books database. You can think of an endpoint as the location where we access a specific API resource, and it is usually associated with a specific URL string. But before we start creating endpoints, we need to make a change in our database_setup.py file.
Where we created our Book table, we need to add some code that returns the object data in an easily serializable format. Serialization will turn an entry into a string format that can be passed around via HTTP.
Our new code should look like this:
class Book(Base):

  __tablename__ = 'book'


  id = Column(Integer, primary_key=True)

  title = Column(String(250), nullable=False)

  author = Column(String(250), nullable=False)

  genre = Column(String(250))


  @property

  def serialize(self):

     return {

        'title': self.title,

        'author': self.author,

        'genre': self.genre,

        'id': self.id,

     }


#we will save the changes and execute this script again.
In the app.py file, we’ll add some endpoints using the @app decorator. It’s important to note that by default, @app.route has a GET method. If we want to use any other HTTP verbs, we have to specify them by passing them via the methods parameter as a list.
@app.route('/')

@app.route('/booksApi', methods = ['GET', 'POST'])

def booksFunction():

   if request.method == 'GET':

       return get_books()

   elif request.method == 'POST':

       title = request.args.get('title', '')

       author = request.args.get('author', '')

       genre = request.args.get('genre', '')

       return makeANewBook(title, author, genre)


@app.route('/booksApi/', methods = ['GET', 'PUT', 'DELETE'])

def bookFunctionId(id):

   if request.method == 'GET':

       return get_book(id)


   elif request.method == 'PUT':

       title = request.args.get('title', '')

       author = request.args.get('author', '')

       genre = request.args.get('genre', '')

       return updateBook(id,title, author,genre)


   elif request.method == 'DELETE':

       return deleteABook(id)
We created two functions booksFunction and bookFunctionId(id). Our first function evaluates whether the request method is GET or POST. If it’s the former, it will return the get_books method. Otherwise, it will return the makeANewBook method.
The makeANewBook() function takes in three parameters. These are the values we need to create a row in our database table.
Our second function, bookFunctionId(), also checks for a GET request. There is a subtle difference between the GET request in booksFunction and bookFunctionId. The GET request in our first function returns all the books in our database, while the GET request in our second function only returns the filtered book.
The bookFunctionId() function also evaluates for PUT and DELETE methods and returns updateBook() and deleteABook(), respectively.
from Flask import jsonify

def get_books():

   books = session.query(Book).all()

   return jsonify(books= [b.serialize for b in books])


def get_book(book_id):

   books = session.query(Book).filter_by(id = book_id).one()

   return jsonify(books= books.serialize)


def makeANewBook(title,author, genre):

   addedbook = Book(title=title, author=author,genre=genre)

   session.add(addedbook)

   session.commit()

   return jsonify(Book=addedbook.serialize)


def updateBook(id,title,author, genre):

   updatedBook = session.query(Book).filter_by(id = id).one()

   if not title:

       updatedBook.title = title

   if not author:

       updatedBook.author = author

   if not genre:

       updatedBook.genre = genre

   session.add(updatedBook)

   session.commit()

   return 'Updated a Book with id %s' % id


def deleteABook(id):

   bookToDelete = session.query(Book).filter_by(id = id).one()

   session.delete(bookToDelete)

   session.commit()

   return 'Removed Book with id %s' % id
At the top, we import jsonify from Flask, a function that serializes the data you pass it to JSON. Data serialization converts the structured data to a format that allows sharing or storage of the data in its original structure.
Before JSON became popular, XML was widely used for open data interchange. JSON involves less overhead when parsing, so you’re more likely to see it when interacting with APIs via Python.
Here we create five different functions that execute CRUD operations. To create a new book, we insert new values in our Book table. To read the existing books from our database, we use all(). To update a book in our database, we first find the book, update the values and add them. And lastly, to delete a book, we first find the book, and then simply call delete() and commit the change.
Verifying endpoints with Postman
To check our endpoints, we can use Postman. Postman is an application for testing APIs that works by sending requests to the web server and getting the responses back. We can test our endpoints via Python as well, but it’s nice to have a sleek user interface to make requests with without the hassle of writing a bunch of code just to test them out.
Once we have Postman installed, let’s start testing our endpoints. In this article, we’ll only test our GET and POST requests.
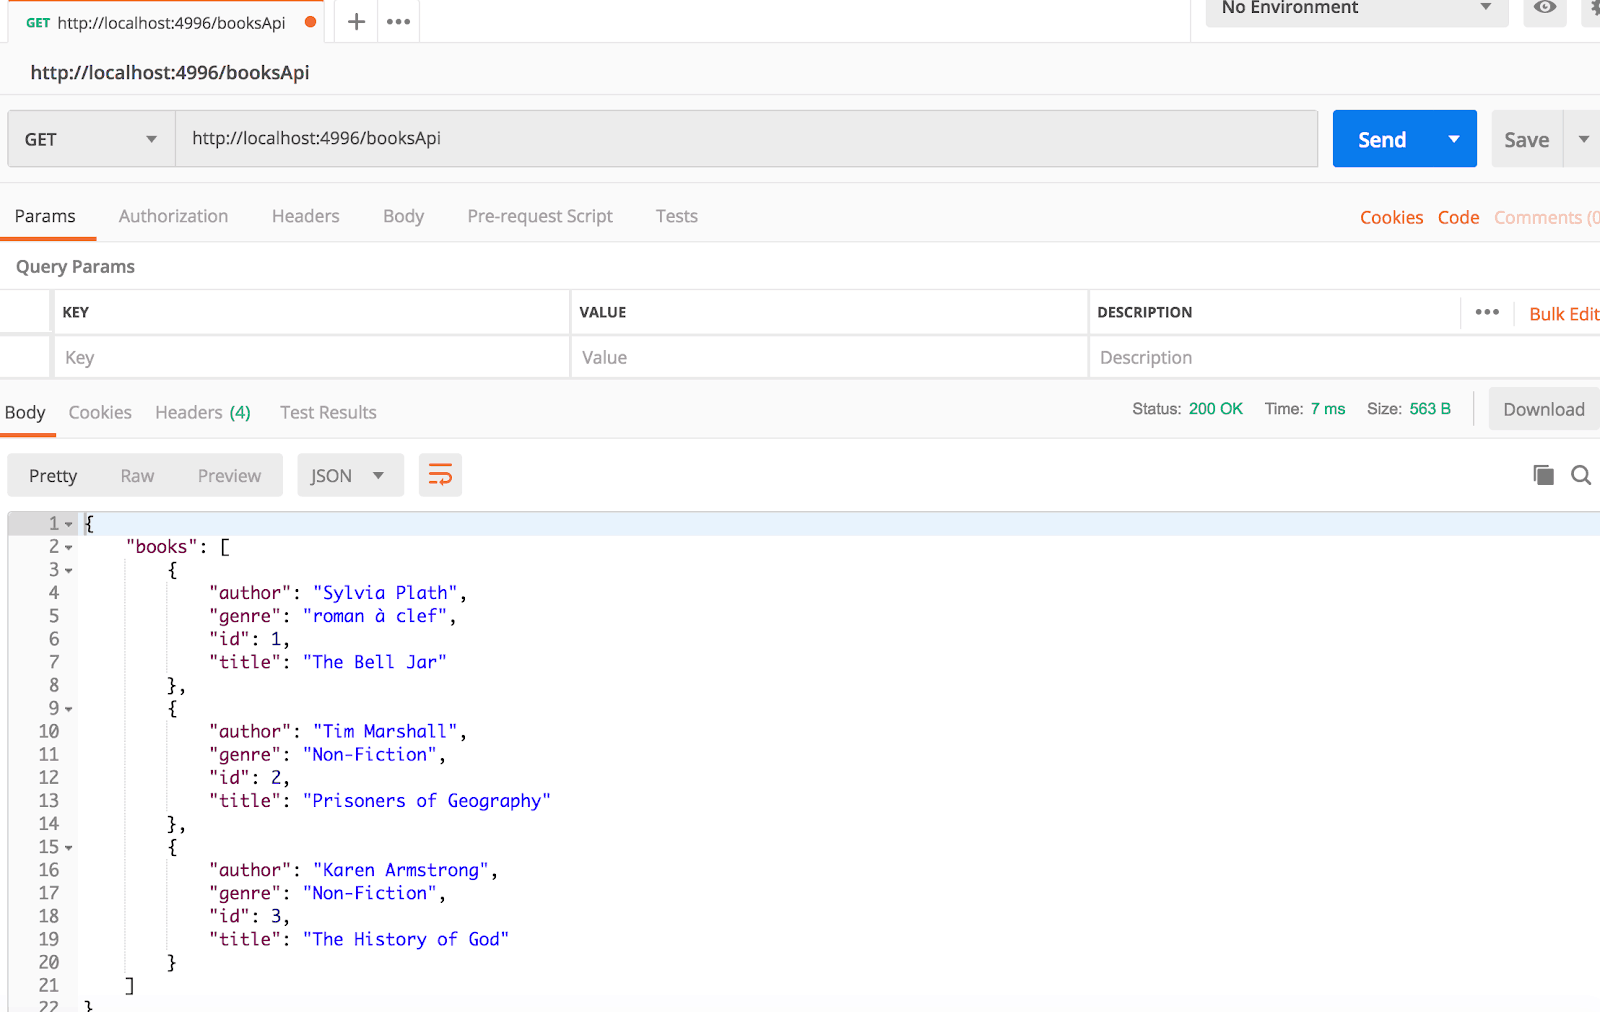
First let’s execute our app.py file. To check if everything is working, we’ll try a GET request. From the dropdown menu, we select GET and send a request to http://localhost:4996/booksApi. You should see something like the following image:
In order to test our POST request, we’ll select POST from the dropdown menu. We then update our values using the key value forms provided. As you’re typing in the updated values, notice how our URL updates automatically.
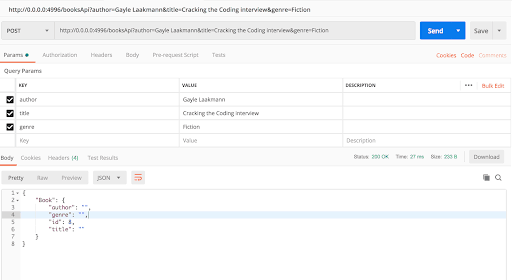
Once we have updated the value, we will hit send again – and voila! We have successfully added a new Book. You can check this by sending a GET request again, and your new book should be in the list.
Conclusion
We just created a Flask web application that provides REST APIs for our books tracker application. As you can see, writing RESTful APIs isn’t hard. Now you have an idea on how to write a RESTful API using Flask.
Because it’s so easy to implement, at least with Flask, you might start thinking more about how you could “API-ify” other web applications. Think about how to determine which resources an online service makes available, how to know who will be accessing the resources, and how to authenticate users and systems which request access to these resources. Further, what’s the best way for your application to pass parameters to your endpoints, and what happens when there are multiple versions of your API?
Python and Flask – optionally using SQLAlchemy to handle the database – are excellent tools to help answer these questions and more, along with the Python and Open Source communities.
Resources
 in San Francisco